
LNMP环境搭建说明

有些问题需要提前说明一下:
- 本文是Debian 11安装与基本配置一文的后续。本文中会用到
sudo命令,它的配置可参考该文; - 本次进行LEMP/LNMP环境搭建的目的,是为了进行WordPress搭建。本文PHP安装的部分提到的扩展都是基于WordPress的需要。请根据你的实际需要安装PHP扩展,而不是直接按照本文安装上一坨你可能不需要的扩展;
- Debian 11防火墙默认没有规则,所以本文中不包含任何防火墙的端口放行设置(我甚至没有开防火墙)。在生产环境中请配置合适的防火墙规则。
LEMP/LNMP环境搭建包括以下内容:(E)Nginx安装、MySQL/MariaDB安装和PHP安装。它们是实现web服务器的一个栈一套程序集。
Nginx安装
Nginx是一个免费的开源网络服务器,提供HTTP请求处理、反向代理、缓存和负载均衡等功能。它易于设置,是Apache的替代品。
这里我安装的是Nginx官方源提供的版本,而不是Debian官方源提供的版本。Nginx官方的安装文档写的很是详细,我们照着来就好~
安装依赖
testu@bogon:~$ sudo apt install curl gnupg2 ca-certificates lsb-release debian-archive-keyring下载官方的签名密钥
testu@bogon:~$ curl https://nginx.org/keys/nginx_signing.key | gpg --dearmor | sudo tee /usr/share/keyrings/nginx-archive-keyring.gpg > /dev/null验证密钥指纹(瞪大双眼,肉眼比对官网提供的数据与本地的显示是否一致)
testu@bogon:~$ gpg --dry-run --quiet --import --import-options import-show /usr/share/keyrings/nginx-archive-keyring.gpg将nginx的稳定源加入系统
testu@bogon:~$ echo "deb [signed-by=/usr/share/keyrings/nginx-archive-keyring.gpg] \
http://nginx.org/packages/debian `lsb_release -cs` nginx" | sudo tee /etc/apt/sources.list.d/nginx.list
设置nginx官方源的优先级高于Debian系统的官方仓库
testu@bogon:~$ echo -e "Package: *\nPin: origin nginx.org\nPin: release o=nginx\nPin-Priority: 900\n" | sudo tee /etc/apt/preferences.d/99nginx更新源,并安装nginx
testu@bogon:~$ sudo apt update
testu@bogon:~$ sudo apt install nginx
下面是一些你可能会用到的命令或数据,我随便打一下,你配合着随便看一下。
testu@bogon:~$ sudo nginx -V                       <-- 查看nginx的编译参数
testu@bogon:~$ cat /etc/nginx/nginx.conf           <-- 查看nginx的配置文件
testu@bogon:~$ cat /etc/nginx/conf.d/default.conf  <-- 还是nginx的配置文件
testu@bogon:~$ systemctl status nginx              <-- 查看nginx服务的状态
testu@bogon:~$ sudo systemctl start nginx          <-- 启动nginx服务
testu@bogon:~$ sudo systemctl enable nginx         <-- 设置nginx开机启动
testu@bogon:~$ systemctl status nginx              <-- 确认nginx服务的启动状态
testu@bogon:~$ ip a                                <-- 查看本机IP地址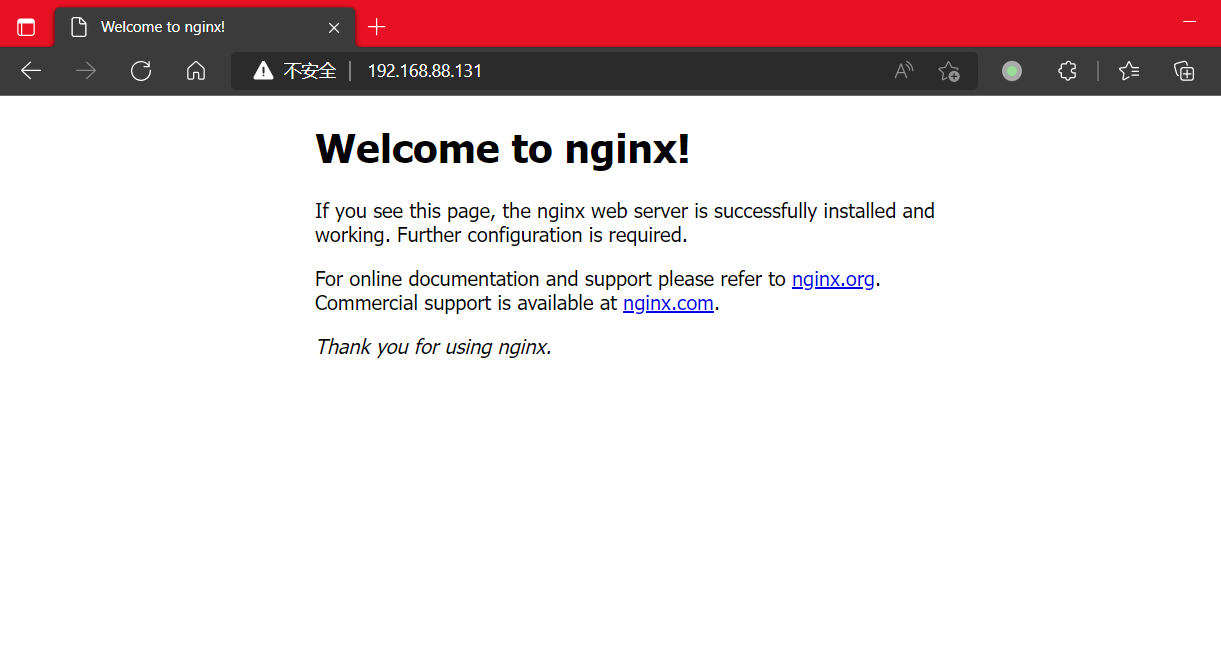
通过服务器的IP地址打开网站,显示欢迎界面表示Nginx成功安装。至于Nginx站点的配置文件,我们在安装完php后回头一起配置。
MariaDB安装
MariaDB是MySQL的直接替代品,完全兼容MySQL,支持所有标准的MySQL功能,包括API和命令行等。
MariaDB的版本选择
我们可以在MariaDB的知识库页面中了解到:
10.7版本是一个短期支持版本(直接不考虑)- 10.6版本是一个长期支持版本
- 10.5支持到2025年6月24号
通过以下命令,我们可以检查Debian官方源提供的mariadb-server是哪个版本的:
testu@bogon:~$ apt-cache search mariadb-server
testu@bogon:~$ apt-cache show mariadb-server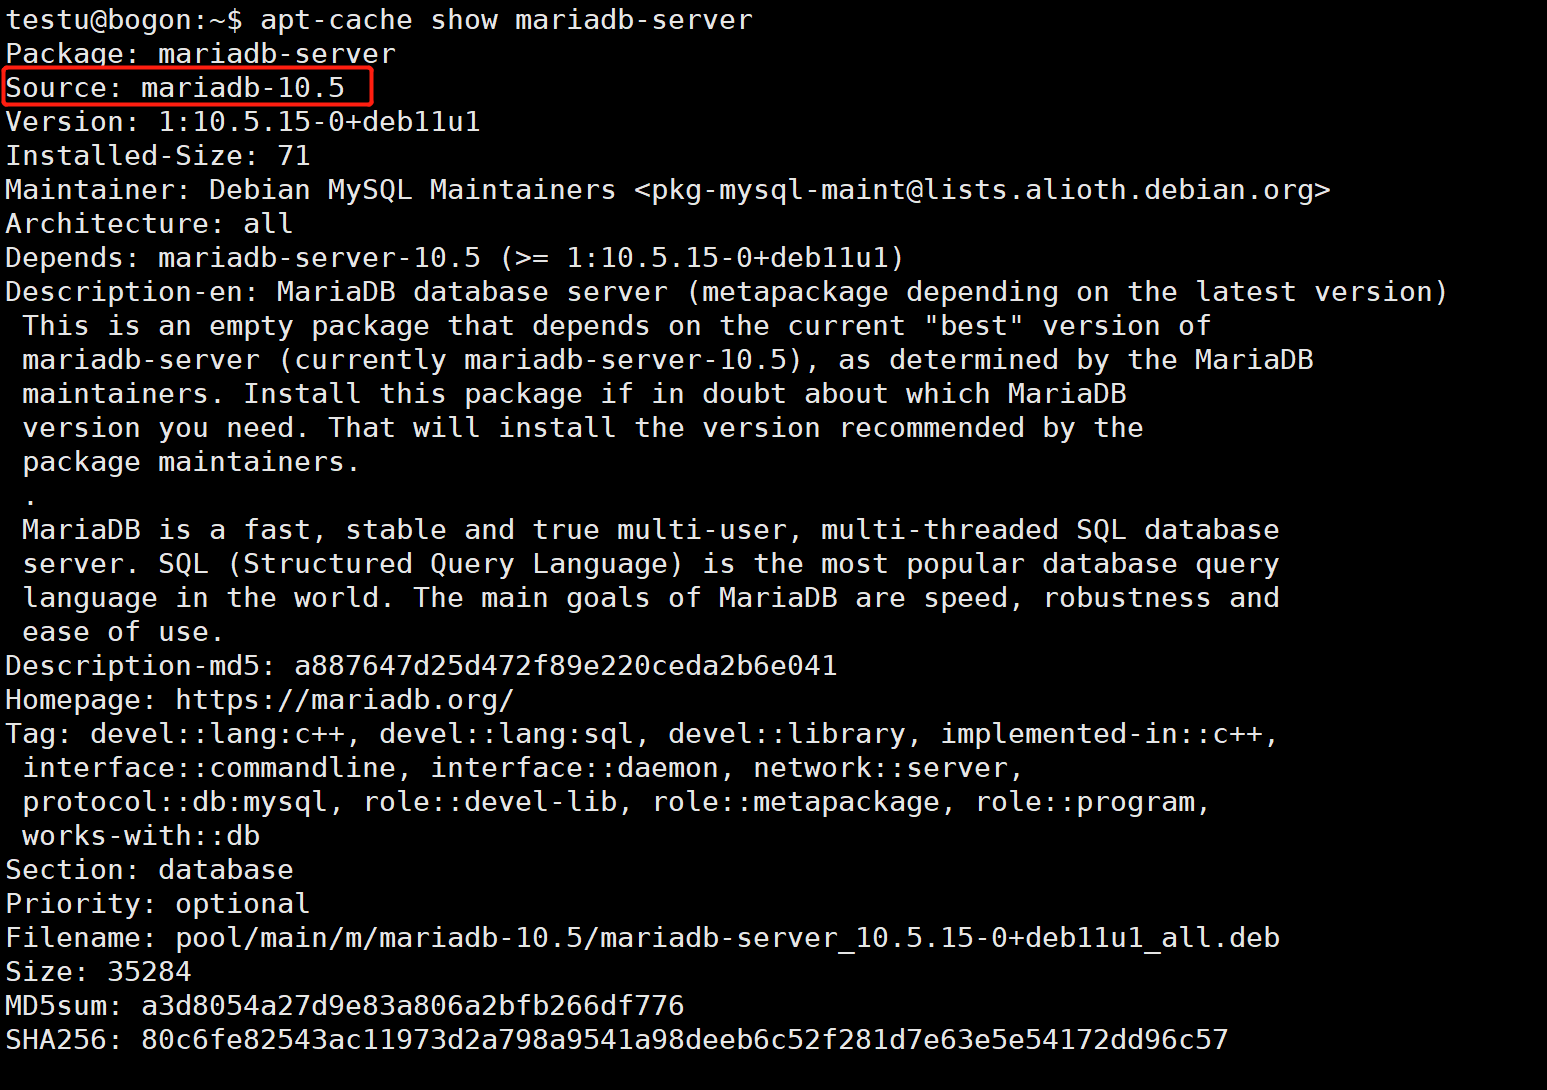
我们可以看到系统自带源中的MariaDB是10.5版本的。
在WordPress需求页面上,我们可以查到WordPress对MariaDB版本的最低要求是10.2。
综上,我们直接安装系统自带源中的MariaDB(10.5版本,MariaDB官方支持到2025年6月24日)即可。
安装MariaDB
testu@bogon:~$ sudo apt update <-- 更新源
testu@bogon:~$ sudo apt install mariadb-server <-- 安装mariadb-server
testu@bogon:~$ systemctl status mariadb <-- 确认mariadb已启动
testu@bogon:~$ sudo mysql_secure_installation <-- 执行数据库自带的安全脚本
testu@bogon:~$ whereis mysql
testu@bogon:~$ ls -al /usr/bin/mysql <-- 此处只是为了让亲知道mysql是一个指向mariadb的链接
testu@bogon:~$ mariadb --help | head -n 10 <-- 查看mariadb的配置文件位置
mariadb Ver 15.1 Distrib 10.5.15-MariaDB, for debian-linux-gnu (x86_64) using EditLine wrapper
Copyright (c) 2000, 2018, Oracle, MariaDB Corporation Ab and others.
Usage: mariadb [OPTIONS] [database]
Default options are read from the following files in the given order:
/etc/my.cnf /etc/mysql/my.cnf ~/.my.cnf
The following groups are read: mysql mariadb-client client client-server client-mariadb
The following options may be given as the first argument:
--print-defaults Print the program argument list and exit.
testu@bogon:~$ ls -al /etc/my.cnf /etc/mysql/my.cnf ~/.my.cnf <-- /etc/my.cnf和~/.my.cnf文件都不存在,/etc/mysql/my.cnf是配置文件
testu@bogon:~$ cat /etc/mysql/my.cnf <-- 查看/etc/mysql/my.cnf配置文件,发现它加载/etc/mysql/conf.d/和/etc/mysql/mariadb.conf.d/目录下的.cnf配置文件
# The MariaDB configuration file
#
# The MariaDB/MySQL tools read configuration files in the following order:
# 0. "/etc/mysql/my.cnf" symlinks to this file, reason why all the rest is read.
# 1. "/etc/mysql/mariadb.cnf" (this file) to set global defaults,
# 2. "/etc/mysql/conf.d/*.cnf" to set global options.
# 3. "/etc/mysql/mariadb.conf.d/*.cnf" to set MariaDB-only options.
# 4. "~/.my.cnf" to set user-specific options.
#
[client-server]
# Port or socket location where to connect
# port = 3306
socket = /run/mysqld/mysqld.sock
# Import all .cnf files from configuration directory
!includedir /etc/mysql/conf.d/
!includedir /etc/mysql/mariadb.conf.d/
testu@bogon:~$ ls -al /etc/mysql/mariadb.conf.d/
testu@bogon:~$ cat /etc/mysql/mariadb.conf.d/50-server.cnf <-- 数据库配置文件位置
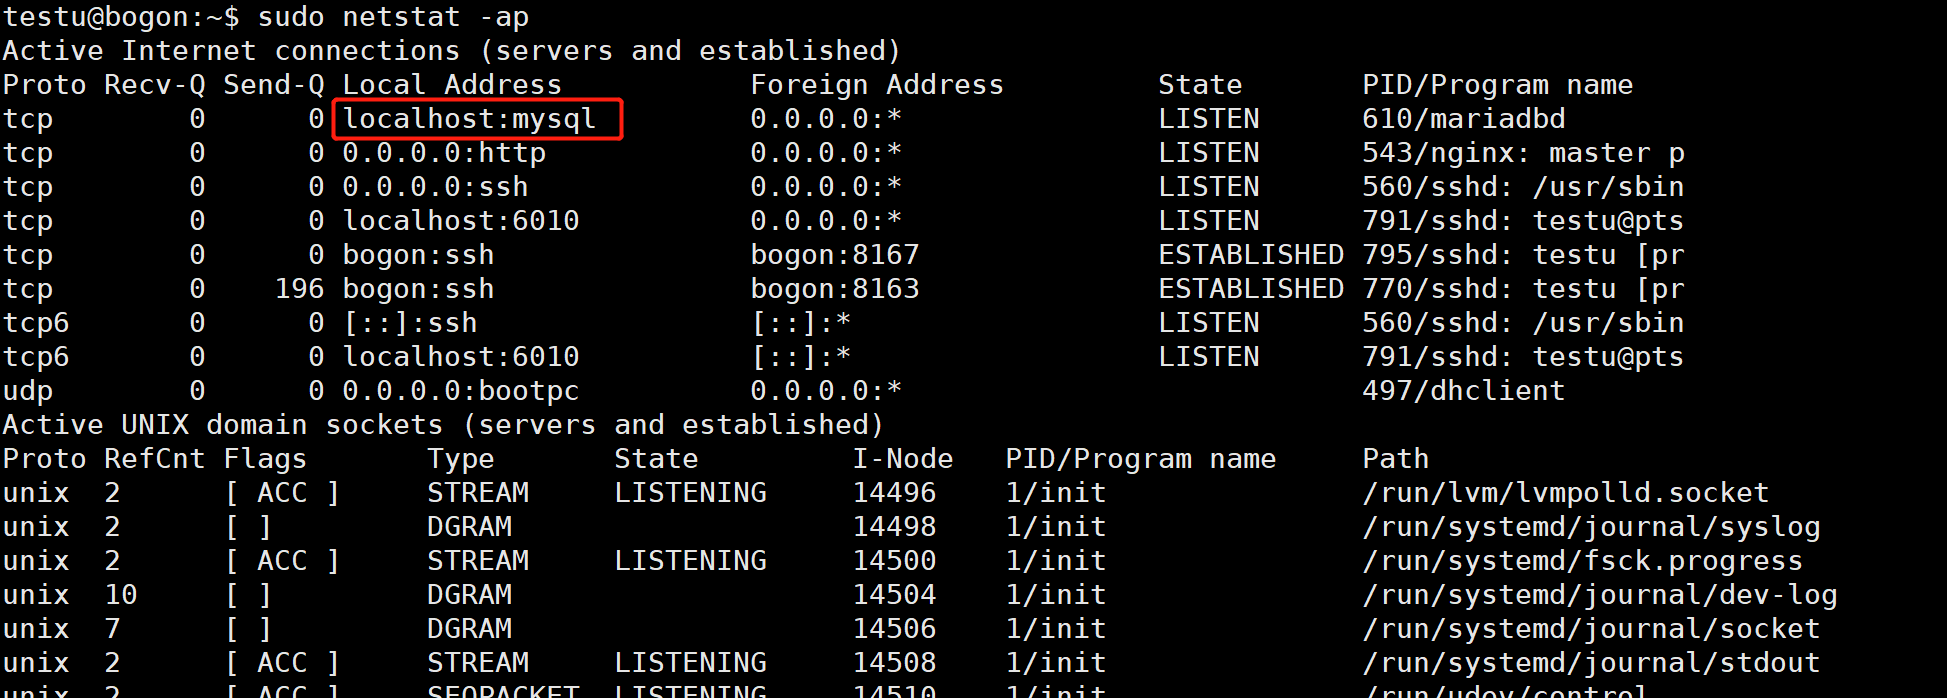
testu@bogon:~$ sudo netstat -ap | grep mariadb <-- 查看数据库的监听情况
testu@bogon:~$ sudo systemctl enable mariadb <-- 设置开机启动更多关于配置文件的信息,可以查看MariaDB文档。
新建数据库和用户,并进行授权
testu@bogon:~$ mysql -uroot -p
Enter password:
MariaDB [(none)]> show databases;
MariaDB [(none)]> create database testenv; <-- 新建数据库
MariaDB [(none)]> create user 'testd'@'localhost' identified by '123456'; <-- 添加新用户
MariaDB [(none)]> grant all privileges on testenv.* to 'testd'@'localhost' with grant option; <-- 授权新用户拥有指定数据库的权限
MariaDB [(none)]> flush privileges; <-- 刷新使之立刻生效
MariaDB [(none)]> exit
testu@bogon:~$ mysql -utestd -p
Enter password:
MariaDB [(none)]> show databases;
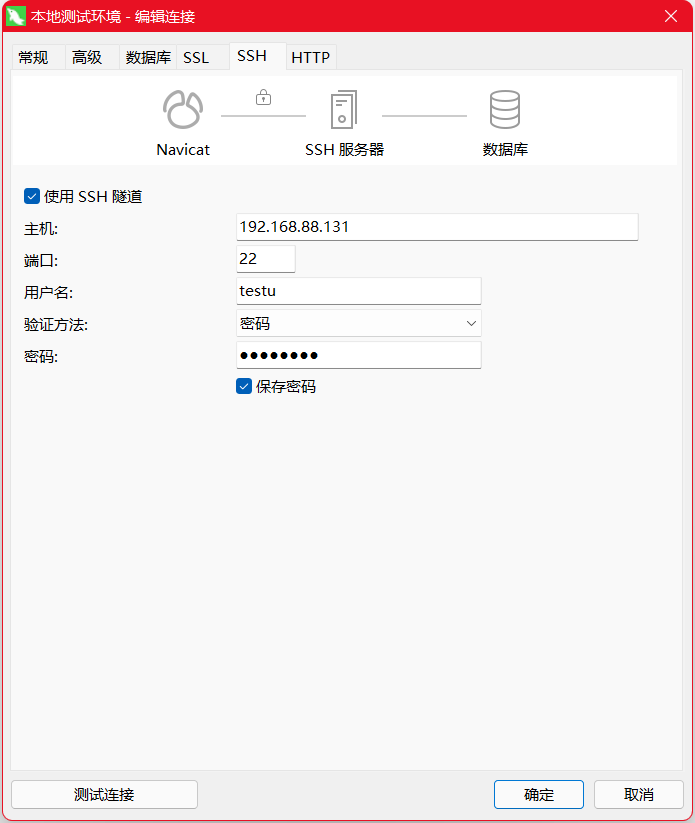
MariaDB [(none)]> exit当然,以上新建数据库、用户和授权操作你也可以使用数据库工具完成,例如Navicat,MySQL Workbench等。需要注意的是MariaDB默认监听的是本地127.0.0.1的IP,如果使用连接工具的话,需要配置SSH连接后再进行数据库连接。具体见下面两张图。另外的解决办法就是修改MariaDB的配置文件使其监听可访问的IP,如有需要还要额外设置防火墙规则。出于安全和我懒的原因,我保持原状——不改配置,使用数据库工具连接SSH后连接数据库。
PHP安装
PHP FastCGI进程管理器(FPM)是FastCGI PHP的替代品,其有更优的产品功能和特性,每秒可以处理更多的请求,可以更高效的处理规模和流量更大的站点。
PHP版本的选择
在WordPress需求页面上,我们可以查到WordPress对PHP版本的最低要求是7.4。
testu@bogon:~$ apt-cache search php-fpm
testu@bogon:~$ apt-cache show php-fpm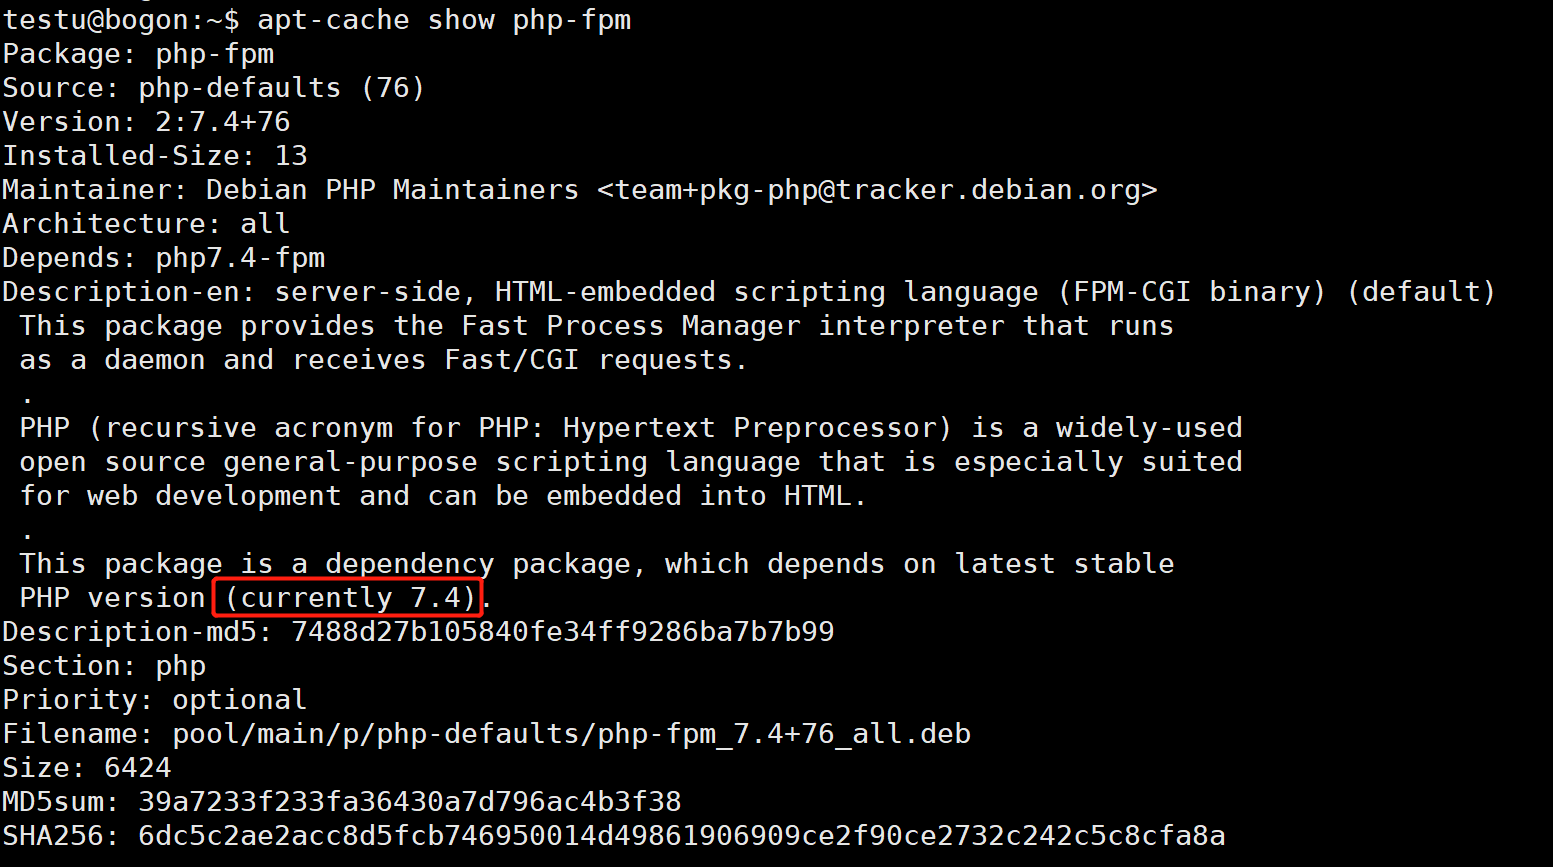
通过以上指令,我们可以确认官方源自带php-fpm的版本就是7.4,所以我们直接安装系统自带的版本(7.4版本)就好。
PHP及扩展的安装
从WordPress官方文档上我们可以看到WordPress所需的PHP扩展及WordPress所要求的服务器软件包。
直接安装是会报错的,如下:
testu@bogon:~$ sudo apt install php-fpm php-{json,mysql,curl,dom,exif,fileinfo,hash,imagick,mbstring,openssl,pcre,xml,zip,bcmath,filter,gd,iconv,intl,mcrypt,simplexml,sodium,xmlreader,zlib,ssh2,ftp,sockets}
[sudo] password for testu:
Reading package lists... Done
Building dependency tree... Done
Reading state information... Done
Note, selecting 'php7.4-xml' instead of 'php-dom'
Note, selecting 'php7.4-common' instead of 'php-exif'
Note, selecting 'php7.4-common' instead of 'php-fileinfo'
Note, selecting 'php7.4-common' instead of 'php-iconv'
Note, selecting 'php7.4-xml' instead of 'php-simplexml'
Note, selecting 'php7.4-xml' instead of 'php-xmlreader'
Note, selecting 'php7.4-common' instead of 'php-ftp'
Note, selecting 'php7.4-common' instead of 'php-sockets'
Package php-mcrypt is not available, but is referred to by another package.
This may mean that the package is missing, has been obsoleted, or
is only available from another source

E: Unable to locate package php-hash
E: Unable to locate package php-openssl
E: Unable to locate package php-pcre
E: Unable to locate package php-filter
E: Package 'php-mcrypt' has no installation candidate
E: Unable to locate package php-sodium
E: Unable to locate package php-zlib
之所以报错是因为PHP版本升级,扩展有些变动,我们敲的命令再正确了。时空变换,人非物也非。我们换个姿势,再来一次:
testu@bogon:~$ sudo apt install openssl libssl-dev libpcre3 libpcre3-dev libsodium23 libsodium-dev zlib1g zlib1g-dev libmcrypt4 libmcrypt-dev imagemagick ghostscript
testu@bogon:~$ sudo apt install php7.4-fpm php7.4-{json,mysql,curl,common,imagick,mbstring,xml,zip,bcmath,gd,intl,ssh2}
testu@bogon:~$ php -i                                <-- 显示php信息
testu@bogon:~$ systemctl status php7.4-fpm           <-- 查看php7.4-fpm服务状态,上面也会显示php-fpm所采用的配置文件为/etc/php/7.4/fpm/php-fpm.conf
testu@bogon:~$ cat /etc/php/7.4/fpm/php-fpm.conf     <-- php-fpm配置文件,实际加载了/etc/php/7.4/fpm/pool.d/目录下的所有.conf配置文件
testu@bogon:~$ cat /etc/php/7.4/fpm/pool.d/www.conf  <-- php-fpm的实际配置文件
testu@bogon:~$ cat /etc/php/7.4/fpm/php.ini          <-- php配置文件
配置php-fpm
testu@bogon:~$ cat /etc/nginx/nginx.conf                    <-- 确认nginx启动的用户,为nginx
testu@bogon:~$ id nginx
testu@bogon:~$ sudo vi /etc/php/7.4/fpm/pool.d/www.conf     <-- 编辑user、group、listen.owner和listen.group属性,改为与nginx启动相同的用户——即nginx
testu@bogon:~$ sudo sed -i 's/;cgi.fix_pathinfo=1/cgi.fix_pathinfo=0/g' /etc/php/7.4/fpm/php.ini
testu@bogon:~$ sudo systemctl restart php7.4-fpm            <-- 重启php7.4-fpm服务
testu@bogon:~$ ls -al /run/php/php7.4-fpm.sock              <-- 确认socket用户已变更
testu@bogon:~$ sudo systemctl enable php7.4-fpm             <-- 设置php-fpm服务开机启动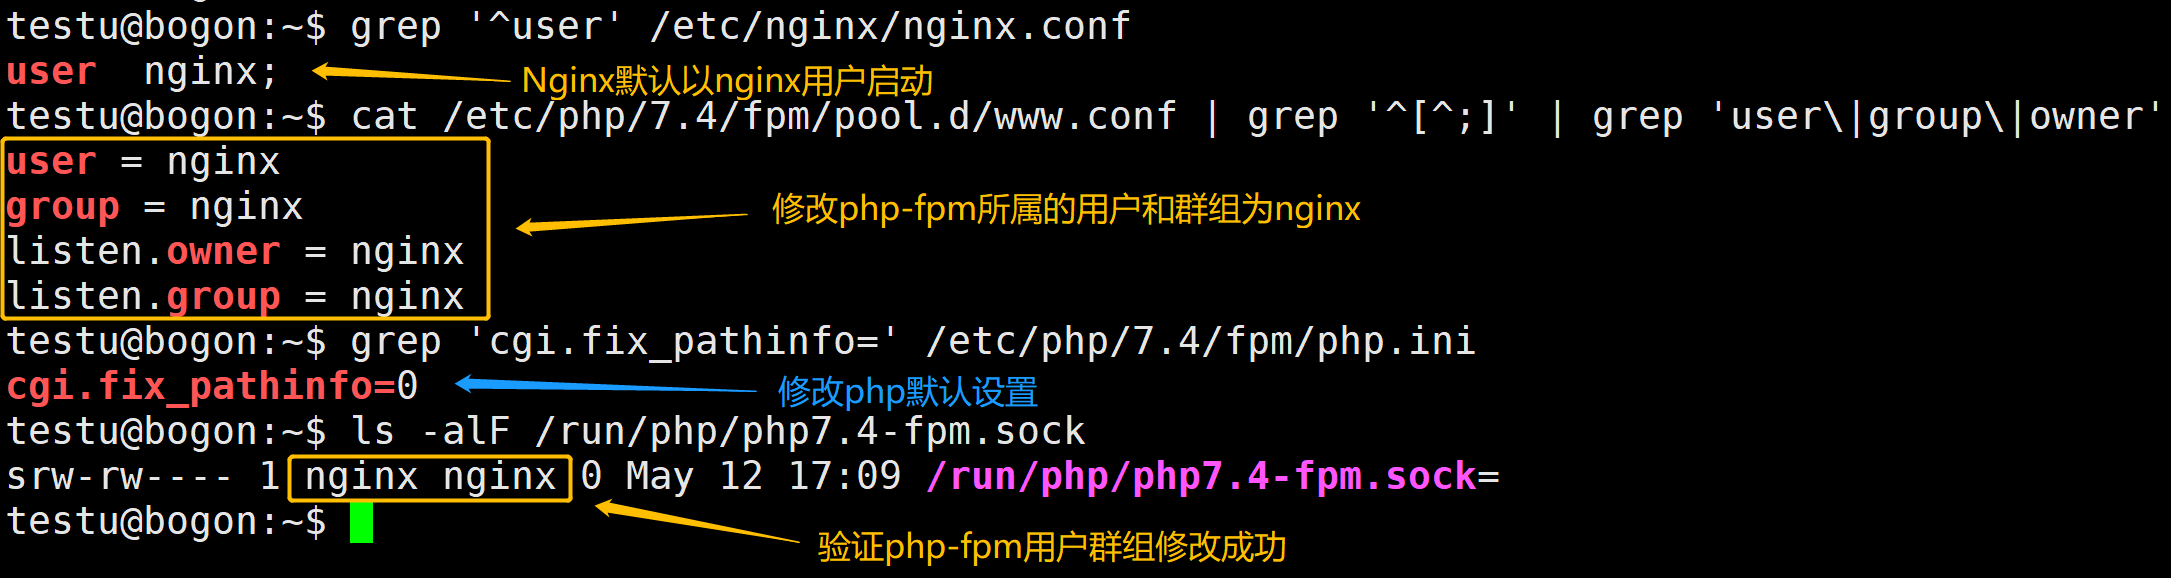
配置后大概是这个样子的,如上图所示。
WordPress搭建
配置Nginx支持php网页
testu@bogon:~$ sudo cp /etc/nginx/conf.d/default.conf /etc/nginx/conf.d/default.conf.20220507.bak  <-- 备份nginx当前的站点配置
testu@bogon:~$ sudo mkdir -p /usr/share/nginx/html/test-env-website                                <-- 建立新站点的根目录
testu@bogon:~$ sudo chown -R nginx:nginx /usr/share/nginx/html/test-env-website/                   <-- 变更站点目录的所有者为nginx用户
testu@bogon:~$ ls -al /usr/share/nginx/html/test-env-website/
testu@bogon:~$ sudo vi /etc/nginx/conf.d/default.conf                                              <-- 编辑nginx的站点配置,文件内容贴在下方
testu@bogon:~$ sudo nginx -t                                                                       <-- 验证nginx配置的正确性
testu@bogon:~$ sudo nginx -s reload                                                                <-- 让nginx重新加载配置文件,使配置生效
testu@bogon:~$ sudo vi /usr/share/nginx/html/test-env-website/info.php <-- 在站点目录下写一个php文件,验证php配置正确修改后的nginx的站点配置文件/etc/nginx/conf.d/default.conf内容如下,即混合了WordPress官方推荐的Nginx配置(链接一、链接二):
# /etc/nginx/conf.d/default.conf

# WordPress single site rules.
# Designed to be included in any server {} block.
# Upstream to abstract backend connection(s) for php
upstream php {
        server unix:/run/php/php7.4-fpm.sock;
}

server {
    listen       80;
    server_name  localhost;

    #access_log  /var/log/nginx/host.access.log  main;

    root   /usr/share/nginx/html/test-env-website;
    index  index.php index.html index.htm;

    location / {
        # This is cool because no php is touched for static content.
        # include the "?$args" part so non-default permalinks doesn't break when using query string
        try_files $uri $uri/ /index.php?$args;
    }

    #error_page  404              /404.html;

    # redirect server error pages to the static page /50x.html
    #
    error_page   500 502 503 504  /50x.html;
    location = /50x.html {
        root   /usr/share/nginx/html;
    }

    # pass the PHP scripts to FastCGI server listening on 127.0.0.1:9000
    #
    location ~ \.php$ {
        #NOTE: You should have "cgi.fix_pathinfo = 0;" in php.ini
        include fastcgi_params;
        fastcgi_intercept_errors on;
        fastcgi_pass php;
        #The following parameter can be also included in fastcgi_params file
        fastcgi_param SCRIPT_FILENAME $document_root$fastcgi_script_name;
    }

    # WordPress global restrictions file

    # Global restrictions configuration file.
    # Designed to be included in any server {} block.
    location = /favicon.ico {
        log_not_found off;
        access_log off;
    }

    location = /robots.txt {
        allow all;
        log_not_found off;
        access_log off;
    }

    # Deny all attempts to access hidden files such as .htaccess, .htpasswd, .DS_Store (Mac).
    # Keep logging the requests to parse later (or to pass to firewall utilities such as fail2ban)
    location ~ /\. {
        deny all;
    }

    # Deny access to any files with a .php extension in the uploads directory
    # Works in sub-directory installs and also in multisite network
    # Keep logging the requests to parse later (or to pass to firewall utilities such as fail2ban)
    location ~* /(?:uploads|files)/.*\.php$ {
        deny all;
    }

    # General WordPress rules

    location ~* \.(js|css|png|jpg|jpeg|gif|ico)$ {
        expires max;
        log_not_found off;
    }
}用于验证php配置的/usr/share/nginx/html/test-env-website/info.php文件内容如下:
<?php
phpinfo();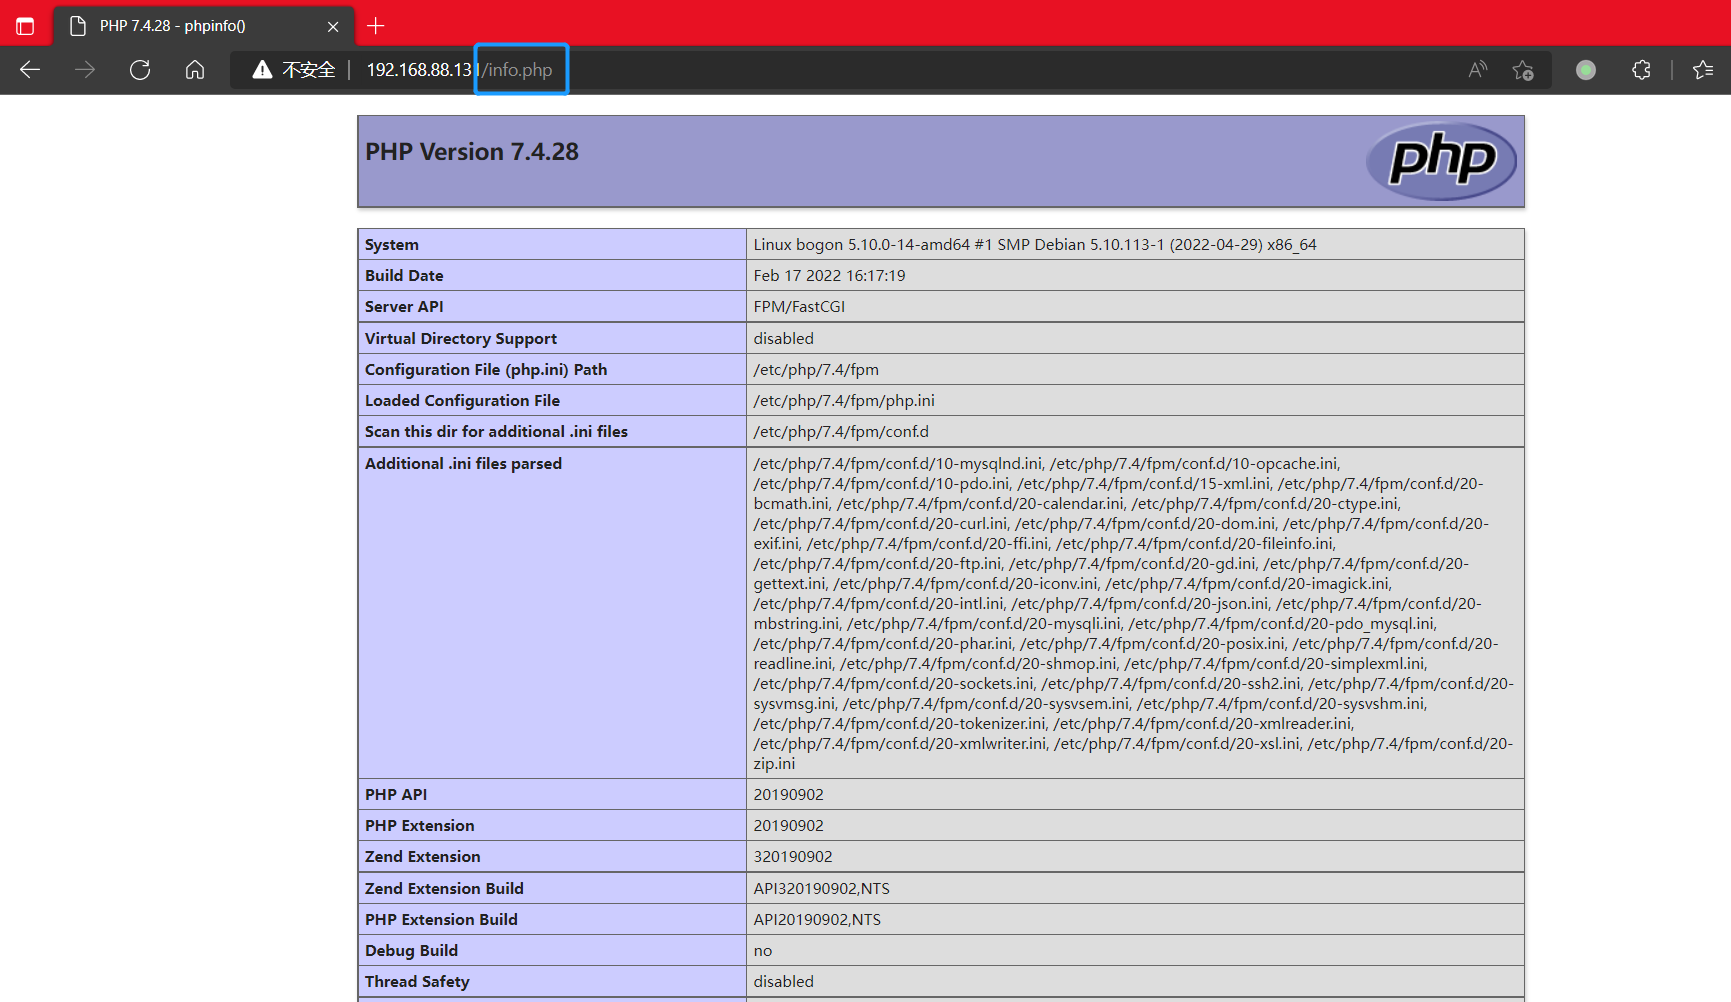
通过IP地址访问站点下的info.php页面,成功显示内容表示Nginx-PHP被正确配置。撒花。
WordPress搭建
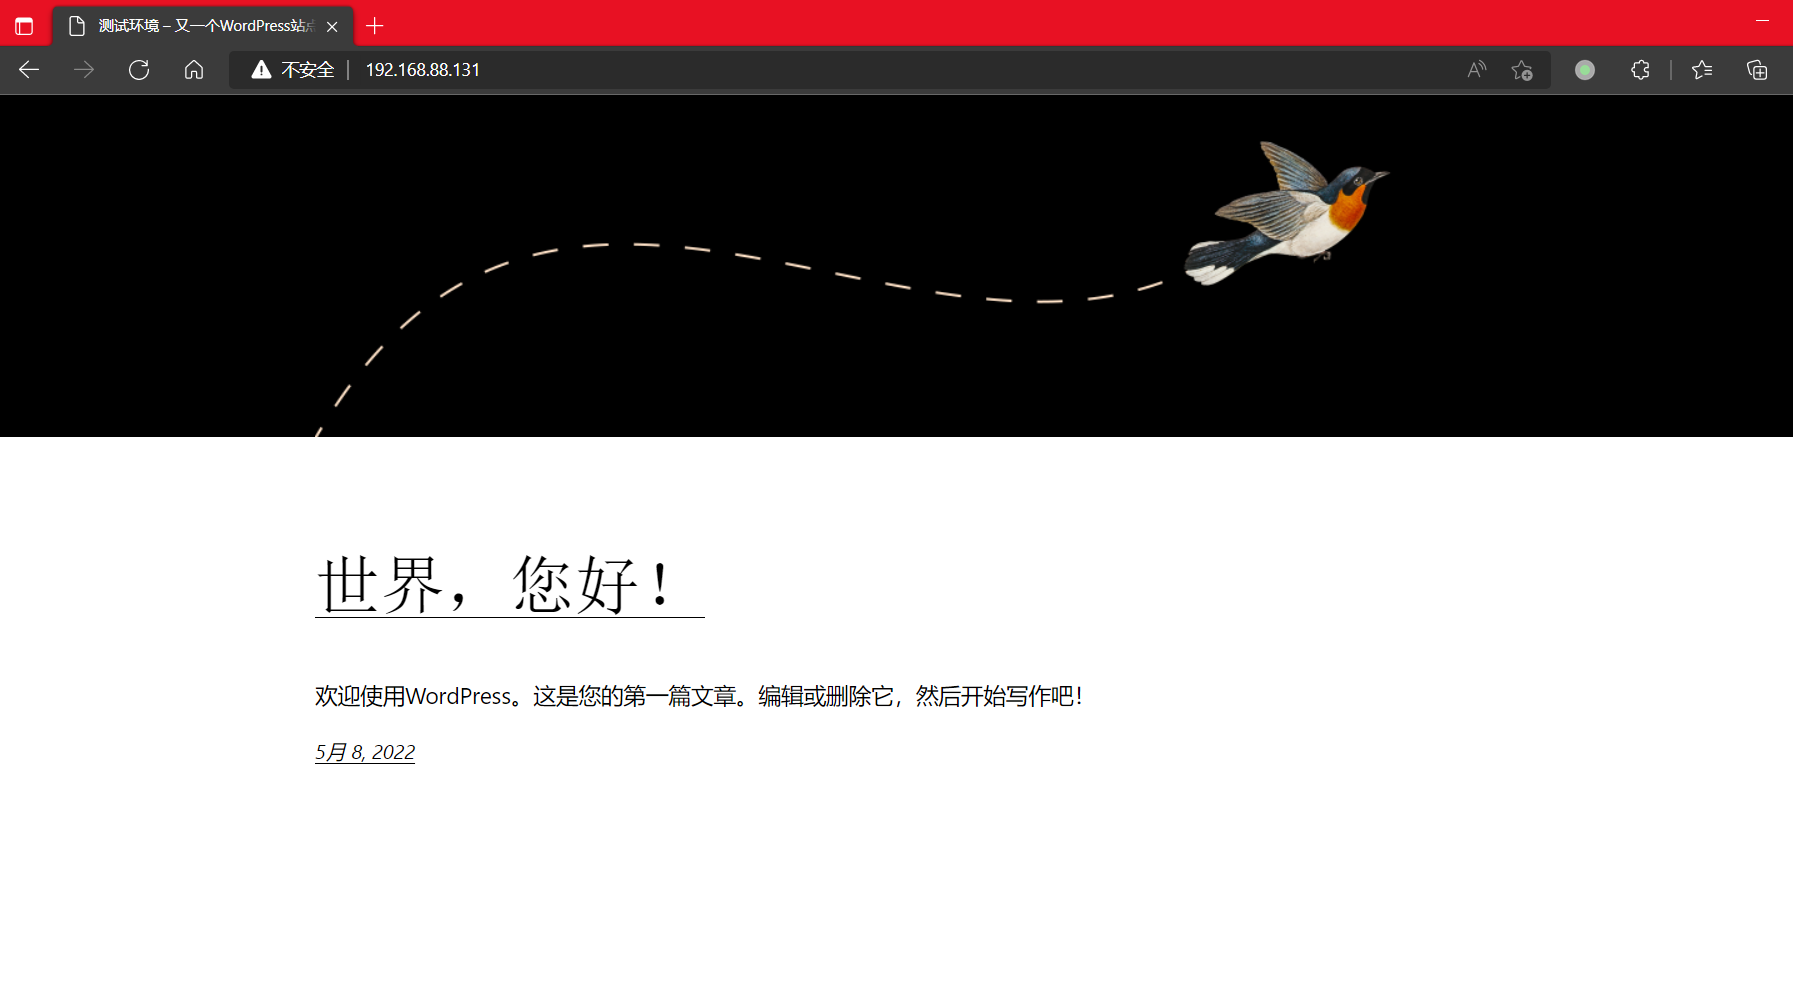
testu@bogon:~$ sudo rm -rf /usr/share/nginx/html/test-env-website/info.php        <-- 删除用于测试的info.php文件,以防止他人查看本地的php环境数据
testu@bogon:~$ wget https://wordpress.org/latest.tar.gz                           <-- 下载最新版的WordPress
testu@bogon:~$ tar xzvf latest.tar.gz                                             <-- 解压文件
testu@bogon:~$ sudo mv ./wordpress/* /usr/share/nginx/html/test-env-website/      <-- 移动文件到网站目录下
testu@bogon:~$ rm -rf ./wordpress/                                                <-- 删除移走文件后剩下的空目录
testu@bogon:~$ sudo chown -R nginx:nginx /usr/share/nginx/html/test-env-website/  <-- 修改网站目录下全部文件的所有者
剩下的就是打开网站,按提示一步一步安装WordPress了。放个安装好的截图~
最后说一下,如果遇到错误,可以试着通过Nginx和php的错误日志来尝试确定、解决问题~